Has your air fryer quickly become the most important appliance in your kitchen? There’s simply no better way to be a speedy chef! An air fryer is an essential life hack for whipping up crispy, yummy meals and treats in a pinch. However, most of us didn’t grow up with air fryers. As a result, we have absolutely no idea how to properly maintain them. Have you been living with a dirty air fryer? It’s a pretty common problem because the “ease” of owning an air fryer can easily lure you into a sense of believing that this is a maintenance-free appliance. The truth is that air fryers do need to be cleaned regularly. Are you wondering how to clean an air fryer? While the specifics of how each air fryer must be cleaned vary by manufacturer, there are some air fryer cleaning hacks to know about that will make the task much easier.
Should You Be Cleaning Your Air Fryer After Every Use?
Yes! Cleaning your air fryer regularly is essential. In fact, you could be putting your family’s health in jeopardy if you’re not thoroughly cleaning your air fryer often enough. There’s a misconception that the heat of the air fryer will “burn off.” The opposite is actually true. Grease and food particles will ultimately begin to accumulate in the basket and cooking tray. This “gunk” will form bacteria that can make people sick if it is left to sit. That means that any food you cook in the future will come into contact with that bacteria. Cleaning your air fryer is a matter of health!
In addition to being a matter of health, cleaning an air fryer regularly is also a way to do your “future self” a favor. When oil and grease drip off of food being cooked in an air fryer, they create a gunky, sticky mess that will create a “burnt-on” effect inside your air fryer. This can be extremely hard to clean if it’s left in place. What if you don’t see a big mess after using your air fryer? Even small crumbs that fall to the bottom of the fryer can attract pests to your kitchen. Cleaning an air fryer after every use is the best way to avoid the need to struggle through a huge deep-cleaning session once your fryer becomes “disgusting.”
How to Clean an Air Fryer
First, it’s important to retrieve the cleaning instructions provided by the manufacturer of your air fryer. The truth is that there are many different styles of air fryers out there that have their own special cleaning requirements. Be sure to follow any special steps suggested by the manufacturer of your fryer to avoid compromising the function of your appliance. However, some basic air fryer cleaning hacks will come in handy if you have a basic unit. Take a look at the simplest way to get your air fryer clean, sparkling, and ready for the next round of cooking up something special!
Let Your Air Fryer Cool Down
Never try to clean an air fryer that is still hot after use. You always want to unplug your air fryer after using it if you intend to clean it. Let the air fryer cool for at least 30 to 40 minutes before you start the cleaning process.
Start With Removable Parts
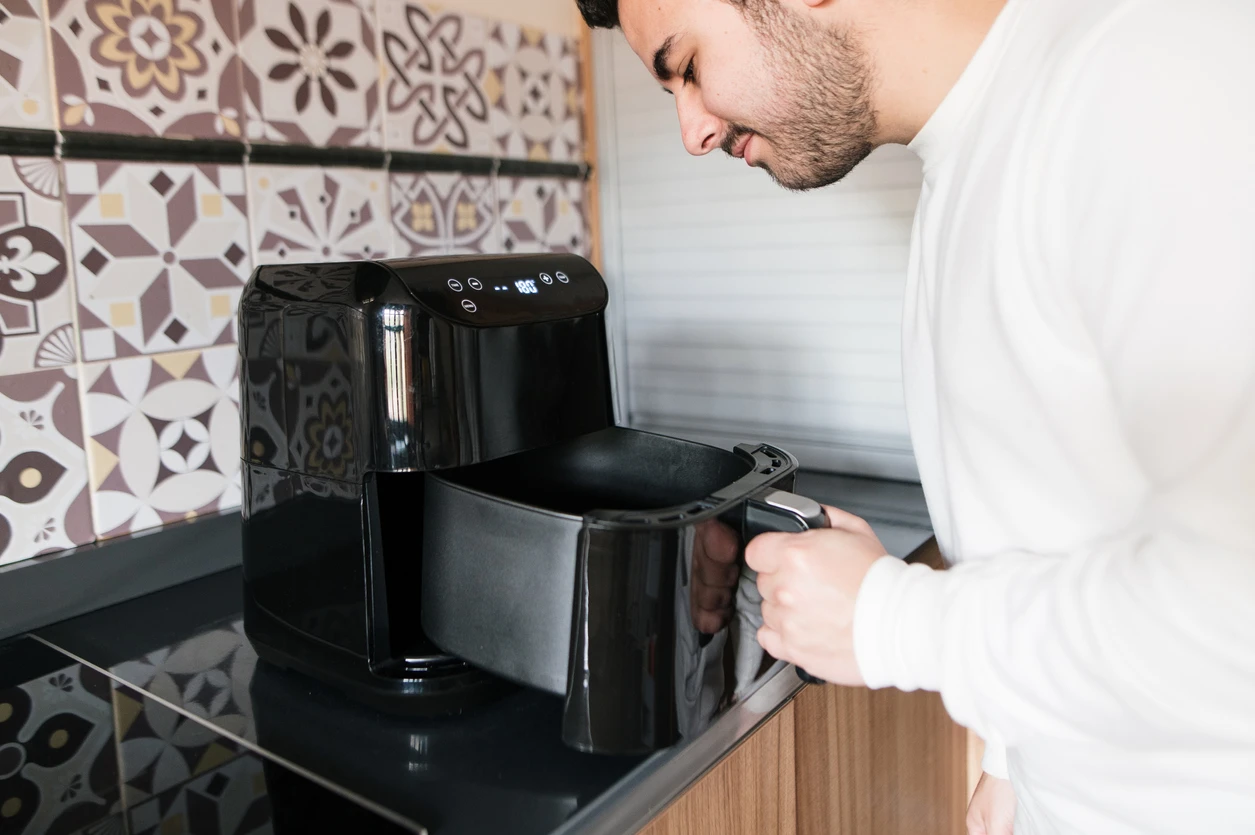
The easiest way to clean an air fryer is to do it in sections. Start by taking out all of the removable parts. If you haven’t allowed any crusted-on food particles to linger inside your air fryer, these parts should be very easy to clean. Soak the removable parts in hot, soapy water for 10 to 20 minutes. You can give them a gentle scrubbing using a sponge after they have soaked for a bit. If your manufacturer instructions state that your air fryer’s parts are safe for the dishwasher, you can also feel free to pop them in!
What do you do if some of your air fryer parts are covered in stubborn, caked-on debris? You can consider scrubbing them with a homemade cleaning paste made of water and baking soda using a soft-bristled brush to tackle the tougher debris. Giving parts extra time to soak can also help to loosen up tough debris.
How to Clean an Air Fryer Basket
The air fryer basket is the most important part of the cleaning process because it’s the feature that your food comes into direct contact with during cooking. Begin by removing your air fryer basket from the unit. In most cases, the tray will be attached to a cooking tray that slides out of the unit. Detach the basket from the tray to begin cleaning.

One of the best air fryer cleaning hacks is to grab a toothpick or skewer before you begin cleaning your basket. This is a great way to remove any food particles that are stuck in the basket before you start your deep cleaning. Next, clean the basket using warm water, a soft-bristled brush, and some dish soap. Continue to rinse the basket in warm water until you’re sure that no food debris remains between the grates. Finally, allow the basket to dry. Do the same for the tray.
Special Considerations When Cleaning an Air Fryer Basket
Baskets on many models of air fryers are actually made with a nonstick coating that can easily be ruined by using abrasive cleaning materials. Abrasive materials can ultimately cause the coating to flake off. This is why it’s very important to only use soft brushes, sponges, and clothes when cleaning fryer baskets. Some people also opt to skip soaps in favor of baking soda and water as a way to be very gentle when cleaning their delicate air fryer baskets.
How to Clean an Air Fryer Interior
Cleaning the inside of an air fryer is trickier because you aren’t dealing with removable parts that can be easily rinsed. However, you shouldn’t neglect your air fryer’s interior. The simplest way to clean the inside of your air fryer is to wipe it down using a moist cloth or sponge with just a small bit of dish soap. You want to avoid soaking the sponge in dish soap because this can create a soapy mess inside your air fryer that’s very hard to rinse away. Once you’re done wiping up the inside of the air fryer, use a paper towel to polish and dry the interior. You can also use a paper towel to give the exterior of the air fryer a good polishing.
How to Clean a Deep Fryer Heating Element
Don’t forget to give your air fryer’s heating element a quick pass during your cleaning session. There’s no need to get carried away with this step. Simply turn your air fryer over to access the heating element. Next, use a damp cloth or sponge to gently wipe down the heating element. You can then dry it off with a dry towel or cloth to prevent moisture from getting trapped under your unit. Avoid doing any kind of intensive cleaning that could “soak” the heating element to prevent damage to your unit.
Deep Cleaning Your Air Fryer
What if you’re stuck with a greasy, caked-on mess because you’ve let your air fryer go for a long period of time without cleaning it? All hope is not lost. There are some simple techniques for deep cleaning your air fryer that are very gentle.
How do you remove sticky oil from the air fryer? A baking soda paste is often the best method for getting your fryer to shine again. Simply mix a cup of baking soda with a few tablespoons of water until you create a paste consistency. Next, brush the paste onto your air fryer’s basket and tray using a toothbrush, sponge, or other soft tools. The goal here is to give the paste enough time to penetrate the greasy layer that is covering your fryer parts. This usually takes at least 20 minutes. If your air fryer is very far gone, you might want to consider allowing the paste to sit for 30 to 40 minutes.
When it’s time to remove the paste, go over it with a warm sponge to gently lift it from your fryer parts. This step requires some time and patience because you’ll need to carefully go over every inch to ensure that you remove all of the paste. If you’re still having a hard time getting the paste to lift away embedded grease, it’s acceptable to use the scrubber side of a cleaning sponge to work on the stuck-on grease. However, you should still avoid using any kind of abrasive scrubbing tool at this point.
Reassembling Your Air Fryer
If you’re cleaning your air fryer for the first time, try to make a note of how all the pieces fit together as you’re disassembling it while cleaning it. This knowledge will make the process of fitting everything back together much easier. Make sure that every piece of your air fryer is fully dried before placing it back inside the unit. Wet, moist pieces could attract bacteria and mold. Be sure to wipe away any moisture using a cloth or towel if pieces haven’t fully dried on their own.
How Do I Get Lingering Odors Out of My Air Fryer?
Have the odors of all of the lovely meals you’ve whipped up with your air fryer come back to haunt your kitchen? This is actually a pretty common issue with air fryers. In fact, many people find that their air fryers still smell after they’re done cleaning all of the individual parts. The standard recommendation for removing odors from air fryers is to soak all of the removable parts in soapy water for up to an hour. You may also be able to “cover-up” odors using some natural scents. For instance, cleaning an air fryer using water that contains some fresh-squeezed lemon can help to replace lingering food odors with a fresh citrus smell. Some people also like to rub a cut lemon all over an air fryer’s basket and drawer to create a long-lasting lemon scent before rewashing all of the components again.
It’s important to be cautious when trying to cover up lingering odors in your air fryer. Never use any type of scented sprays or essential oils to cover up smells in your air fryer. These products can actually cause toxic fumes to be released when your air fryer reaches high temperatures. This can leave your food tainted. In addition, some scented products and oils are highly flammable.
Smells might not always be caused by the conditions inside your air fryer. It’s also important to prepare your kitchen properly when frying foods. Good ventilation is important. If possible, turn on any ceiling fans or oven fans in your kitchen to get air circulation going. You can also consider opening a window to allow frying smells to escape instead of being trapped inside your home. Of course, regularly cleaning your air fryer is the best way to ensure that old smells from lingering food don’t get reactivated every single time you turn on the air fryer!
Don’t Live With a Dirty Air Fryer in Your Kitchen
Don’t let the ease of using an air fryer lure you into believing that this is a maintenance-free appliance. The truth is that a dirty air fryer can make you sick. Dirty air fryers can also pose fire risks because sticky, dirty oil that’s caked on the sides of your cooking parts is being reheated every time you turn on the unit. The good news is that cleaning an air fryer should only take a few minutes of your time if you’re being consistent about clearing out oil residue and food particles after every cooking session. Cleaning an air fryer consistently is the best way to maintain a clean, safe cooking unit while also avoiding the need for an arduous deep-cleaning session down the line.